Back to Confectionery / Celebration Desserts Recipes

Author:
candylandcrafts
TikTok
1K
25
Easy DIY Chocolate Graduation Bears & Oreos Recipe for Grads
Celebrate your graduate by making adorable chocolate graduation bears and delicious chocolate-covered Oreos at home! This fun and easy DIY recipe is perfect for party favors, sweet gifts, or a festive treat for any graduation celebration. Learn simple techniques using chocolate molds and basic decorations to create memorable edible masterpieces.
#Graduation
#Chocolate
#DIY
#Dessert
#Oreo
#Party Favors
#Treats
#Easy Recipe
#Celebration
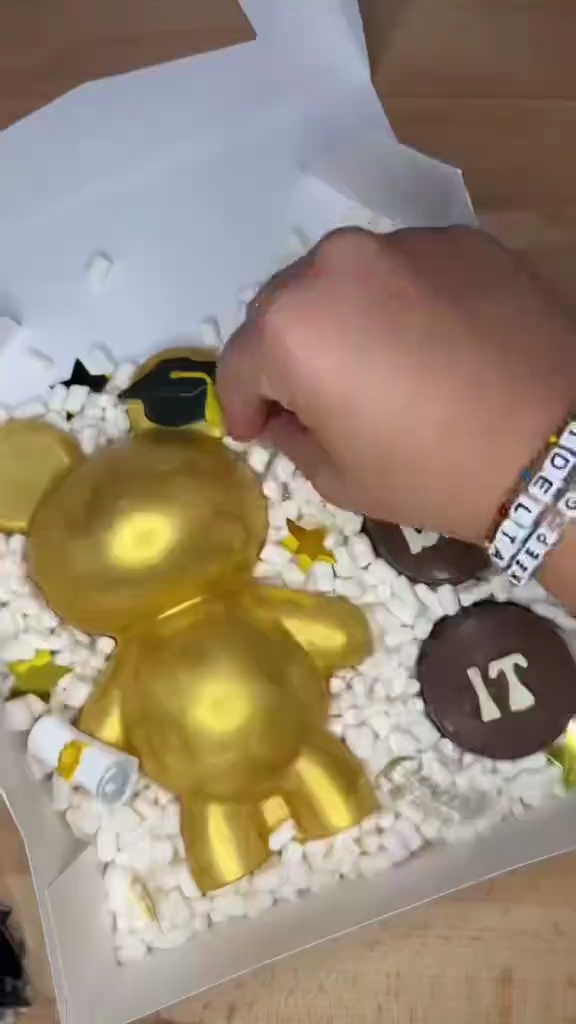
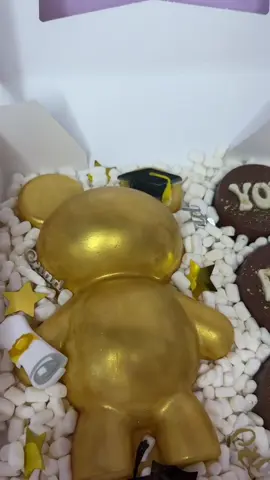
Finished Chocolate Graduation Bear Pops
Recipe Information
20m
Prep Time
5m
Cook Time
45m
Total Time
12
Servings
Easy
Confectionery / Celebration Desserts
English
Nutrition (per serving)
250
Calories
3g
Protein
30g
Carbs
15g
Fat
Decorated Chocolate-Covered Oreos
Ingredients
advertisement
Servings: 12
💡 Tip: Check off ingredients as you add them to keep track of your progress!
Assortment of Graduation Chocolate Treats
Instructions
0/7 completed
0%
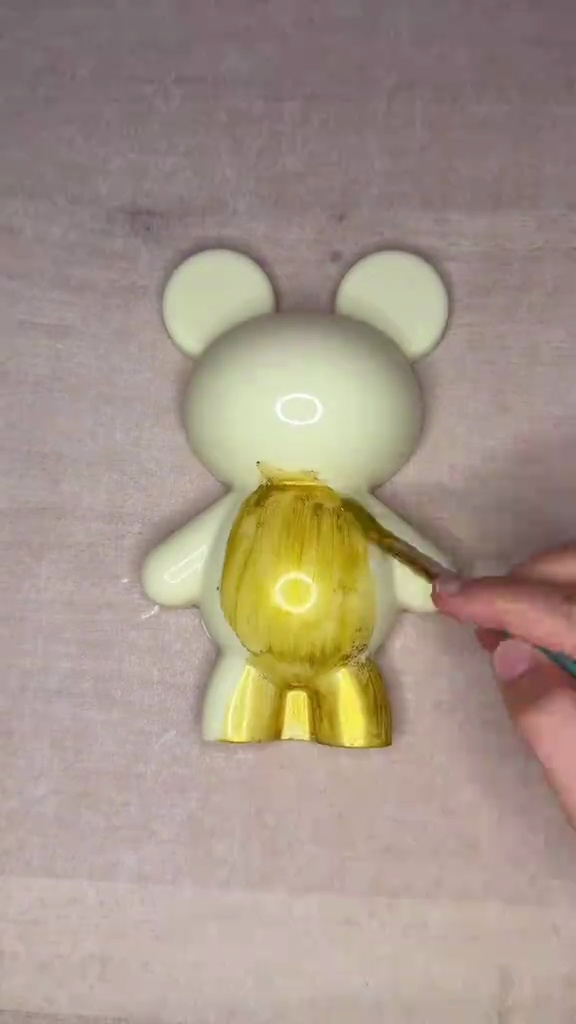
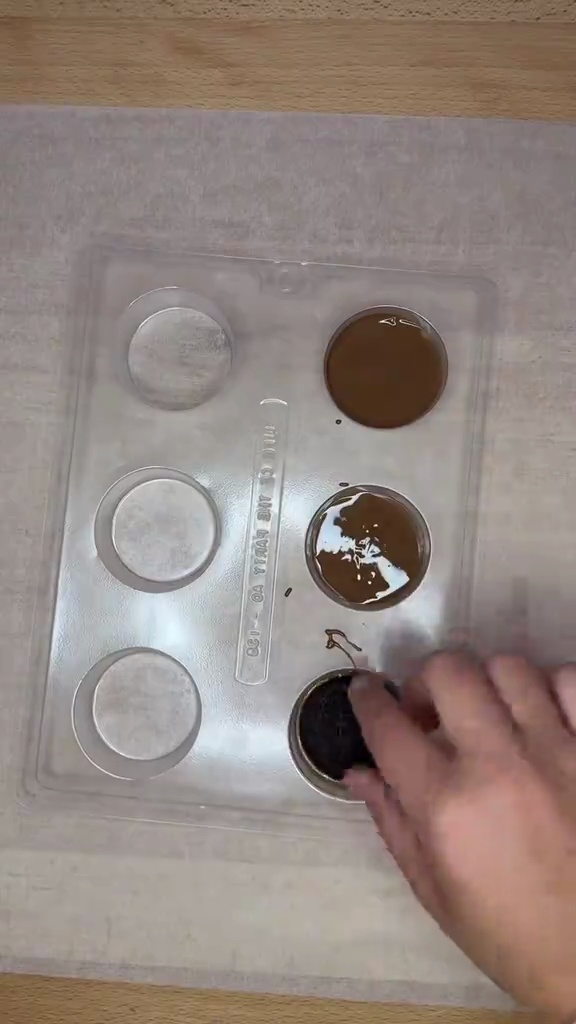
- Melt the chocolate: Carefully melt each color of chocolate separately using a microwave in 30-second intervals, stirring in between, or use a double boiler method until smooth and fluid.2m
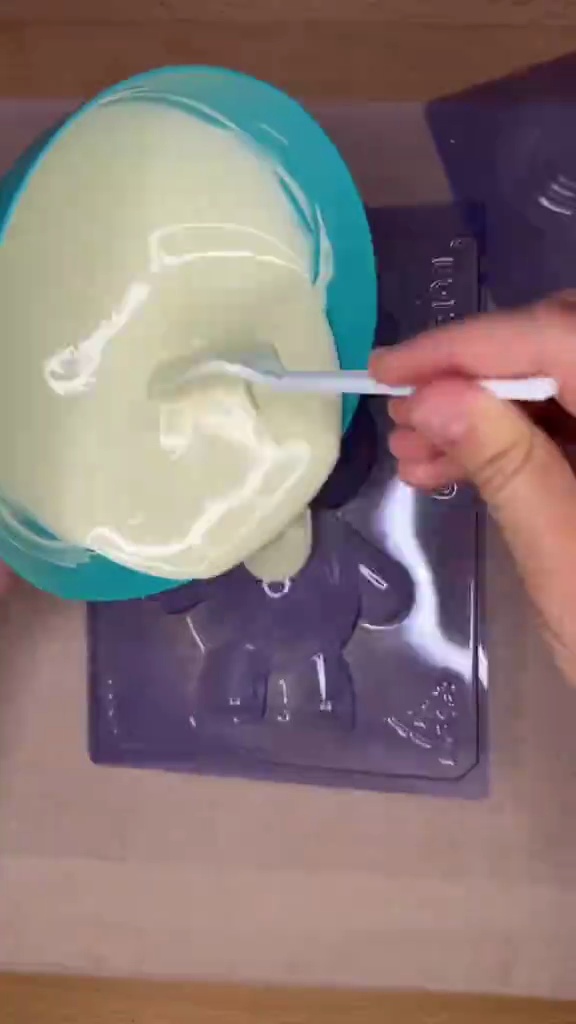 Preview2mPreviewMelt the chocolate: Carefully melt each color of chocolate separately using a microwave in 30-second intervals, stirring in between, or use a double boiler method until smooth and fluid.
 - Fill the bear mold: Pour the melted chocolate (e.g., brown) into the graduation bear mold, ensuring it fills all crevices evenly.1m
 Preview1mPreviewFill the bear mold: Pour the melted chocolate (e.g., brown) into the graduation bear mold, ensuring it fills all crevices evenly.
 - Insert stick (optional): If making chocolate pops, carefully insert a popsicle stick into the bottom of the bear mold while the chocolate is still wet.0m
 Preview0mPreviewInsert stick (optional): If making chocolate pops, carefully insert a popsicle stick into the bottom of the bear mold while the chocolate is still wet.
 - Fill hat mold: Pour another color of melted chocolate (e.g., white) into the graduation hat mold to create additional decorations.1m
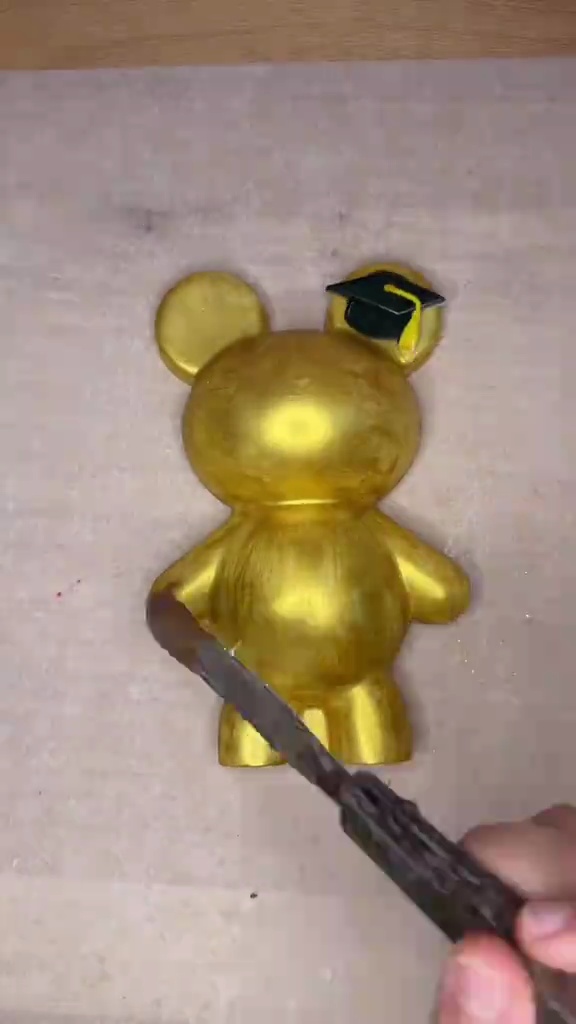 Preview1mPreviewFill hat mold: Pour another color of melted chocolate (e.g., white) into the graduation hat mold to create additional decorations.
 - Dip Oreos: Hold an Oreo cookie with a fork or dipping tool and fully immerse it into the melted chocolate. Lift and tap gently to remove excess chocolate.2m
 Preview2mPreviewDip Oreos: Hold an Oreo cookie with a fork or dipping tool and fully immerse it into the melted chocolate. Lift and tap gently to remove excess chocolate.
 - Decorate Oreos: Immediately place the chocolate-dipped Oreos on parchment paper. While the chocolate is still wet, decorate with sprinkles, edible glitter, or other themed decorations.3m
 Preview3mPreviewDecorate Oreos: Immediately place the chocolate-dipped Oreos on parchment paper. While the chocolate is still wet, decorate with sprinkles, edible glitter, or other themed decorations.
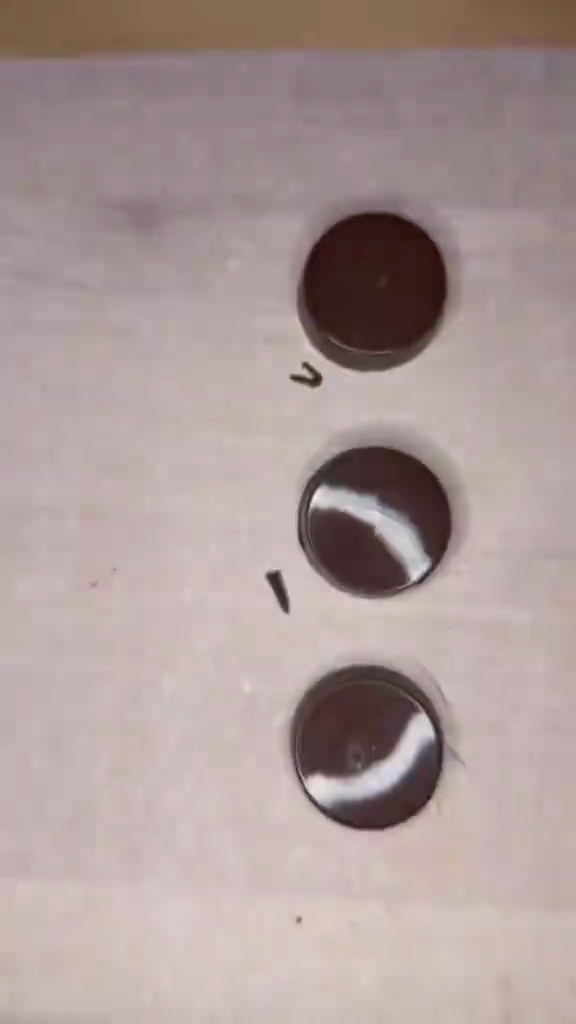
 - Chill to set: Transfer the chocolate molds and decorated Oreos to the refrigerator for 15-20 minutes, or until the chocolate is completely set and firm. Carefully unmold the chocolate bears and hats.15mPreview15mPreviewChill to set: Transfer the chocolate molds and decorated Oreos to the refrigerator for 15-20 minutes, or until the chocolate is completely set and firm. Carefully unmold the chocolate bears and hats.
advertisement
advertisement
💡 Tip: Click on any step to mark it as completed and track your cooking progress!