Back to Middle Eastern Recipes


Author:
adikosh_123
TikTok
667K
6K
Pita Khachapuri with Angel Bakery Pita
A quick and delicious breakfast or dinner idea featuring Khachapuri-style pita. The secret is using Angel Bakery's 'Pita Pita' for its handmade texture and fresh-from-the-oven taste. This recipe combines cottage cheese, mozzarella, and goat feta, topped with an egg and baked until golden.
#Breakfast
#Brunch
#Quick Meal
#Cheese
#Egg
#Pita
#Vegetarian
#Israeli
#Georgian-inspired
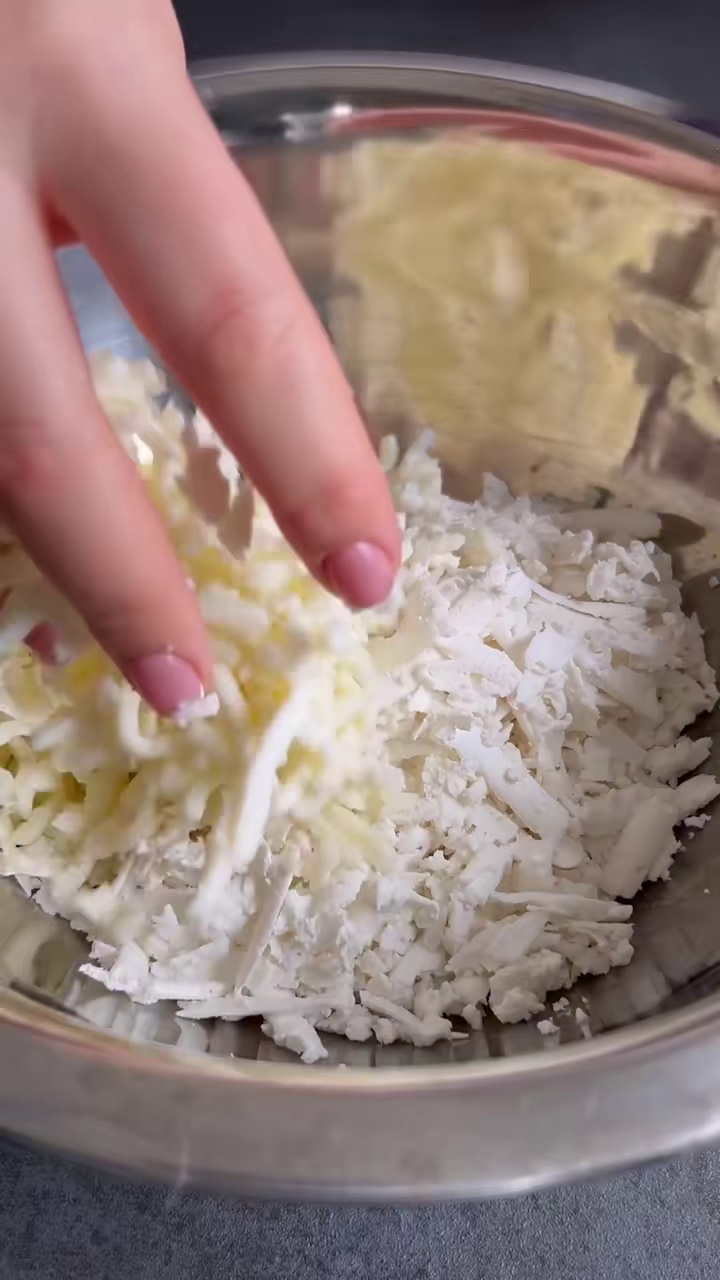
Cheese Filling Mixture
Recipe Information
15m
Prep Time
15m
Cook Time
30m
Total Time
6
Servings
Easy
Middle Eastern
Hebrew
Nutrition (per serving)
350
Calories
22g
Protein
30g
Carbs
18g
Fat
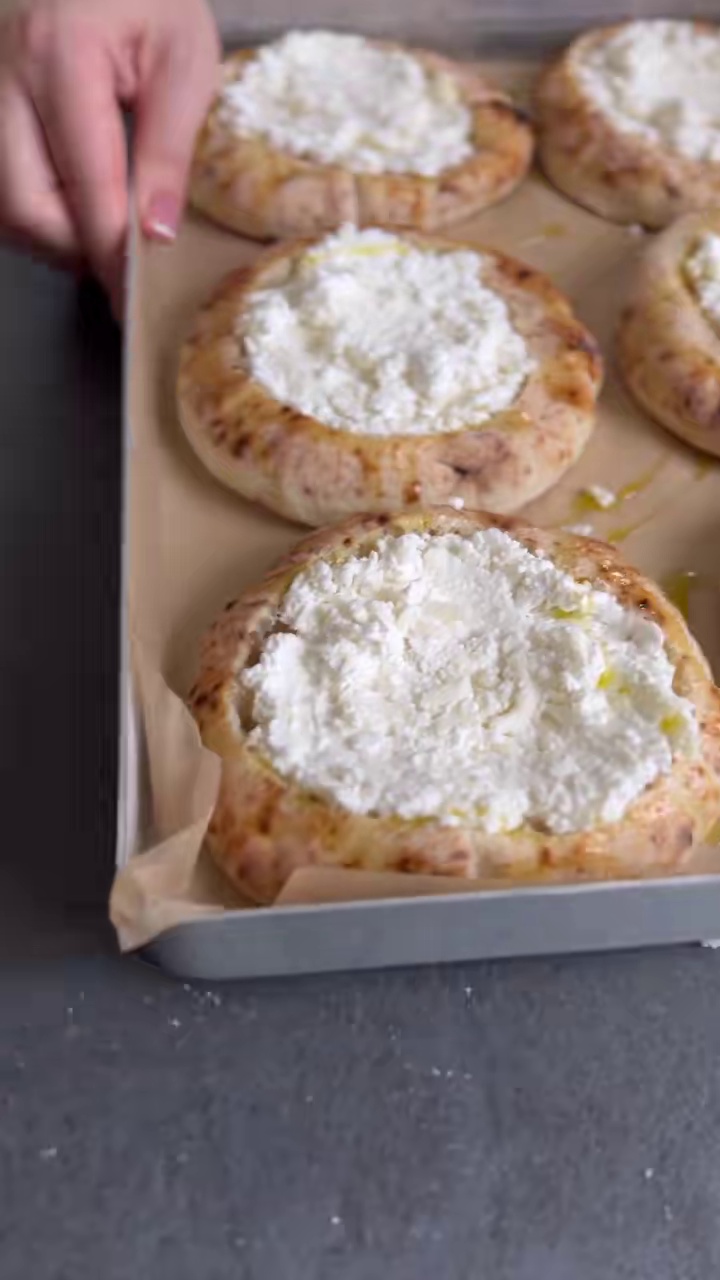
Pitas Filled and Ready for Oven
Ingredients
Servings: 6
💡 Tip: Check off ingredients as you add them to keep track of your progress!
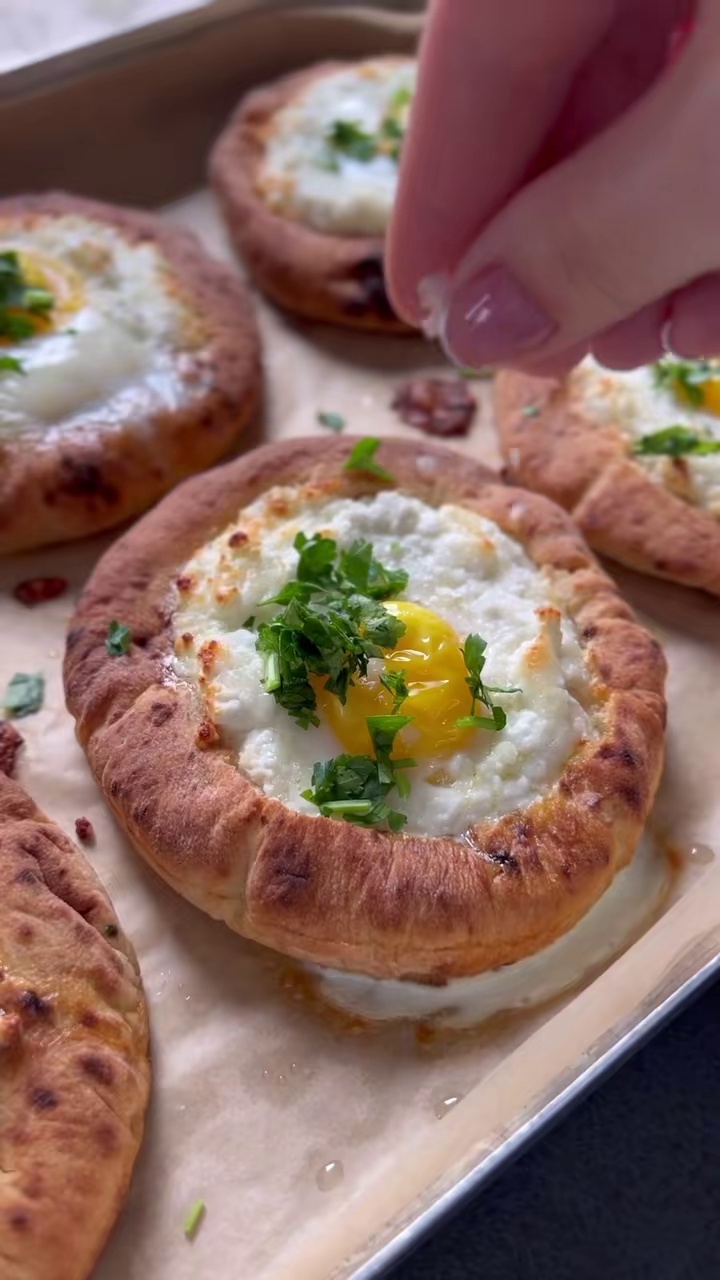
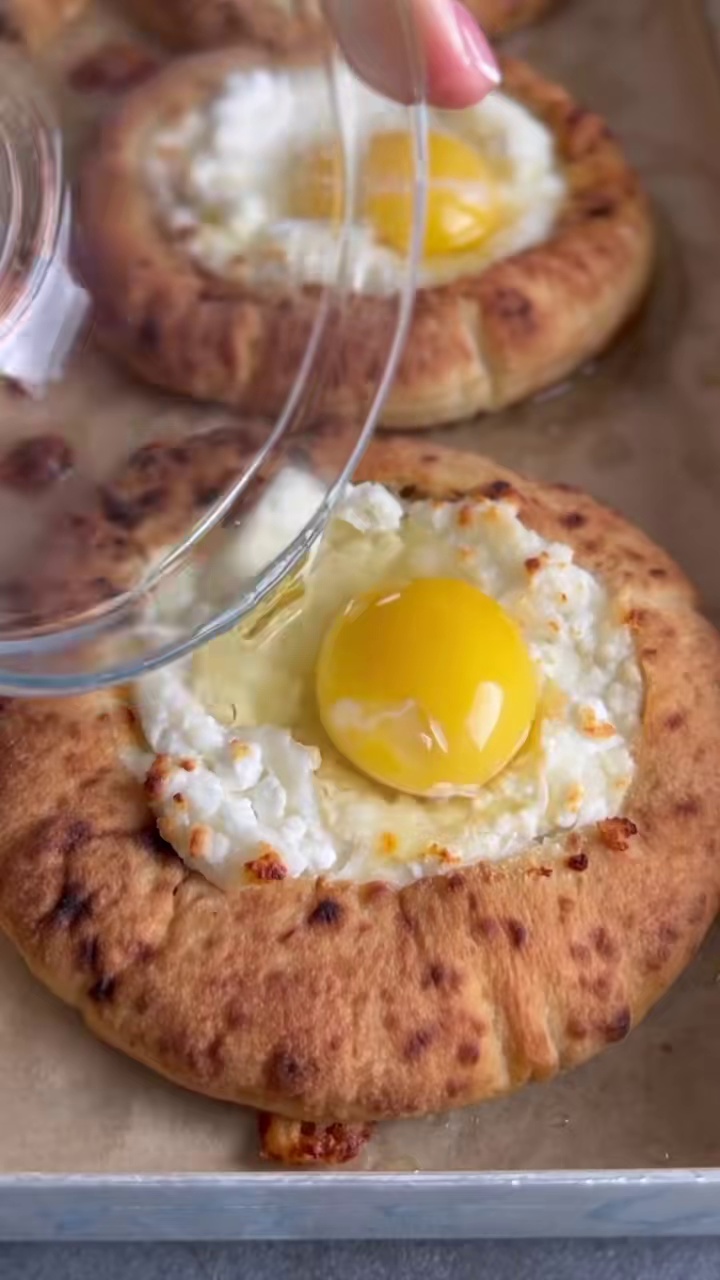
Pitas with Eggs Baking in Oven
Instructions
0/9 completed
0%
- Preheat your oven to 200°C (390°F) on turbo mode.5m
 Preview5mPreviewPreheat your oven to 200°C (390°F) on turbo mode.
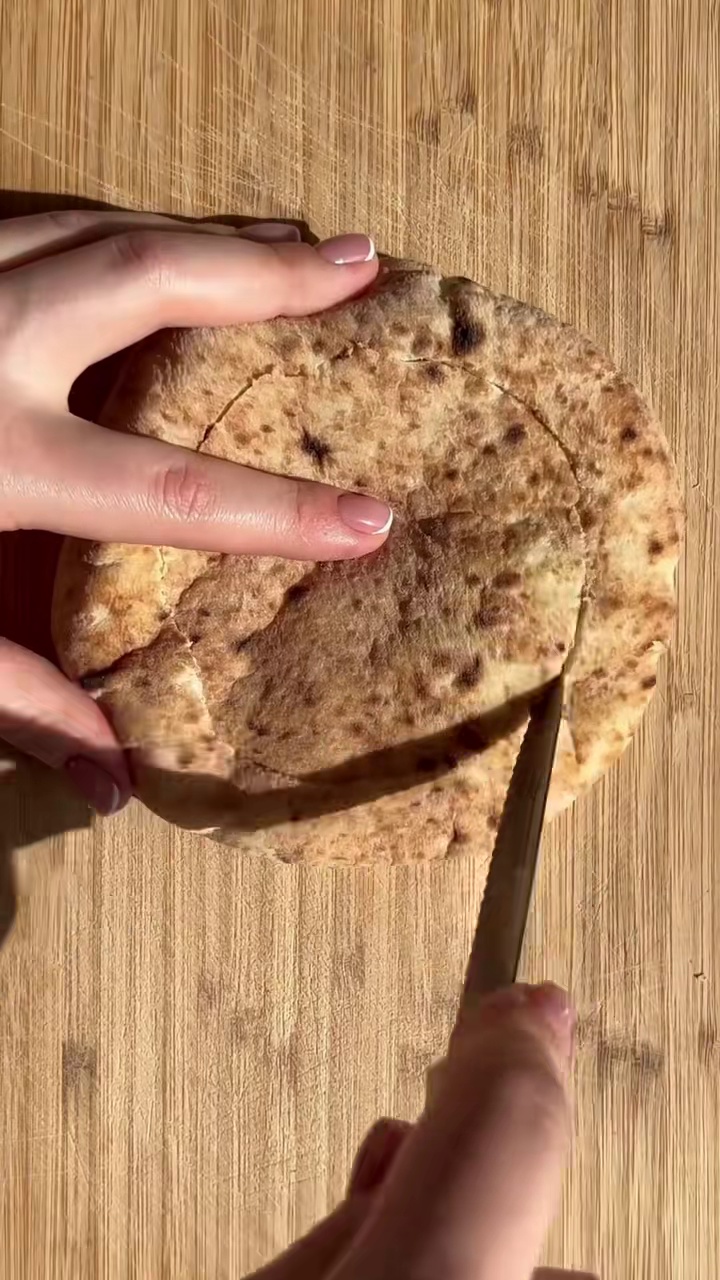
 - Carefully cut a circular opening in the top part of each pita, creating a cavity, and remove the cut piece.3m
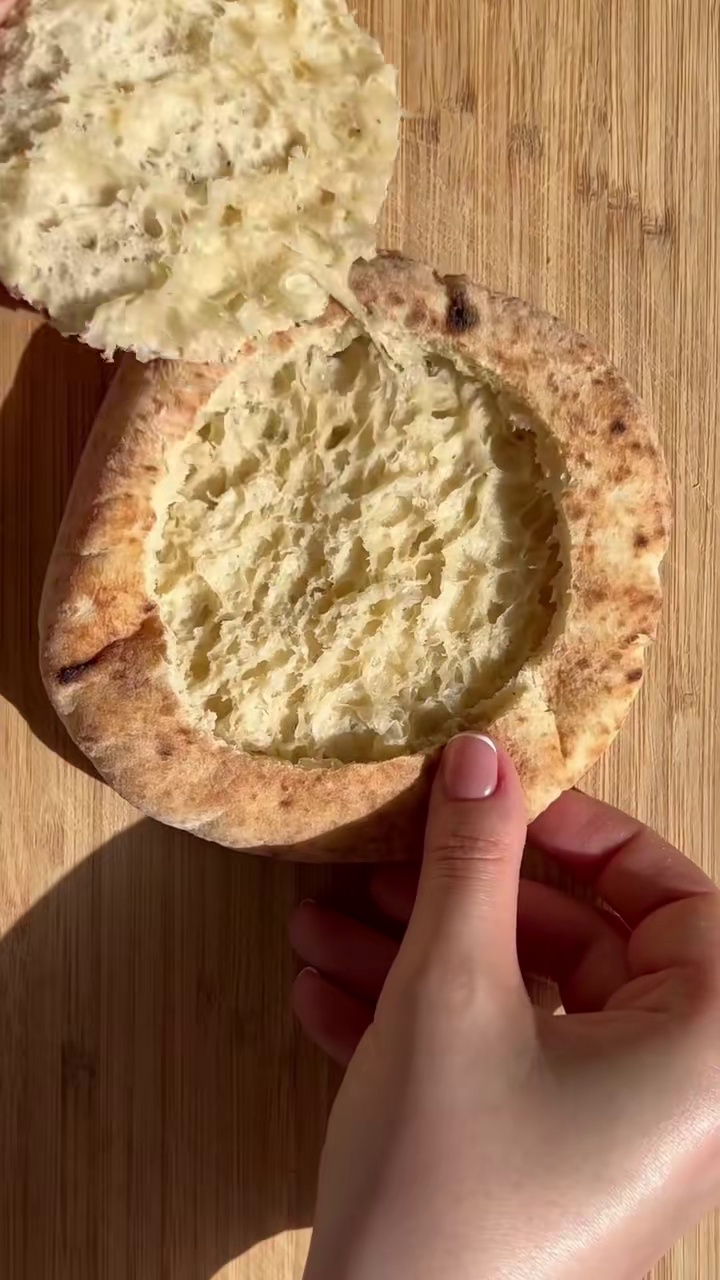 Preview3mPreviewCarefully cut a circular opening in the top part of each pita, creating a cavity, and remove the cut piece.
 - In a mixing bowl, combine the cottage cheese, grated mozzarella (or yellow cheese), and grated goat feta cheese. Mix these cheeses thoroughly until well combined.2mPreview2mPreviewIn a mixing bowl, combine the cottage cheese, grated mozzarella (or yellow cheese), and grated goat feta cheese. Mix these cheeses thoroughly until well combined.
- Spoon the cheese mixture evenly into the cavity of each of the six prepared pitas, filling them generously.2m
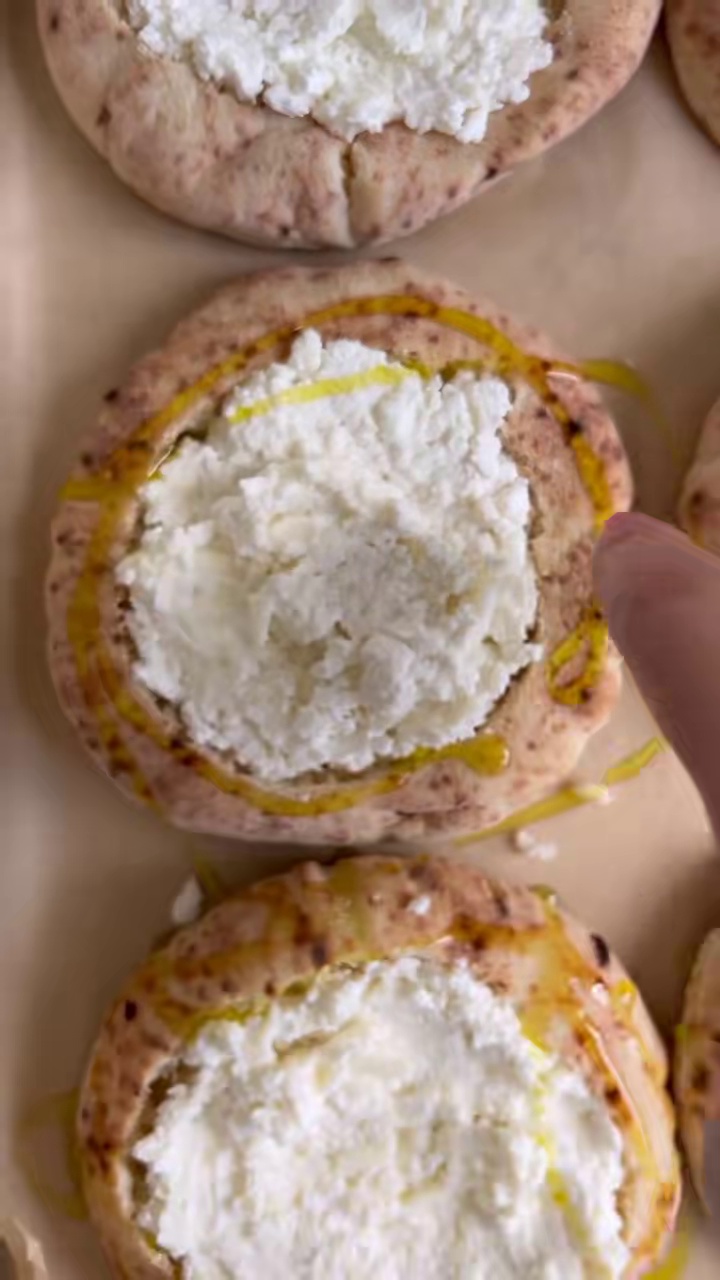 Preview2mPreviewSpoon the cheese mixture evenly into the cavity of each of the six prepared pitas, filling them generously.
 - Lightly brush the top edges of the filled pitas with olive oil. This will help them brown nicely.1m
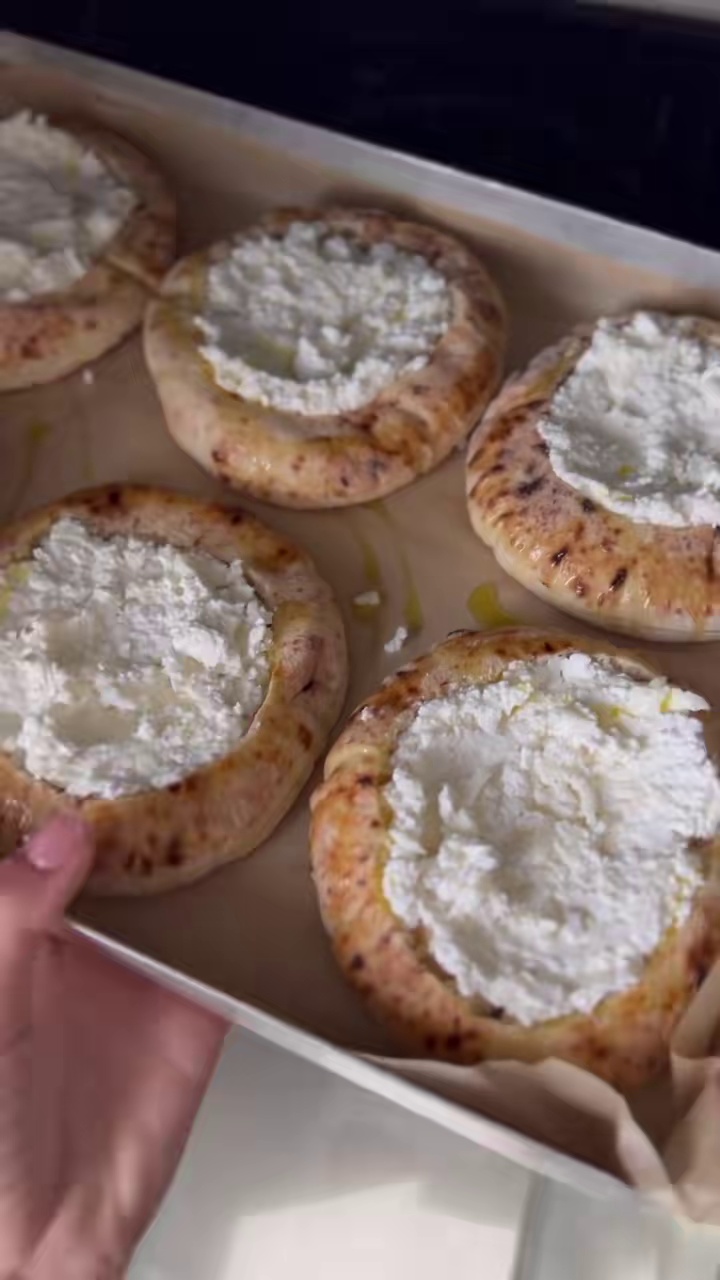 Preview1mPreviewLightly brush the top edges of the filled pitas with olive oil. This will help them brown nicely.
 - Place the filled pitas on a baking sheet and bake in the preheated oven for 5-7 minutes, or until the cheese is melted and bubbly.7m
 Preview7mPreviewPlace the filled pitas on a baking sheet and bake in the preheated oven for 5-7 minutes, or until the cheese is melted and bubbly.
 - Carefully remove the pitas from the oven. Crack one egg directly into the center of the melted cheese filling in each pita.1m
 Preview1mPreviewCarefully remove the pitas from the oven. Crack one egg directly into the center of the melted cheese filling in each pita.
 - Return the pitas to the oven and continue baking for another 5-8 minutes, or until the egg whites are set and the yolks are cooked to your desired consistency (runny yolks are traditional for Khachapuri).8mPreview8mPreviewReturn the pitas to the oven and continue baking for another 5-8 minutes, or until the egg whites are set and the yolks are cooked to your desired consistency (runny yolks are traditional for Khachapuri).
- Remove the Pita Khachapuri from the oven and serve immediately while hot.1m
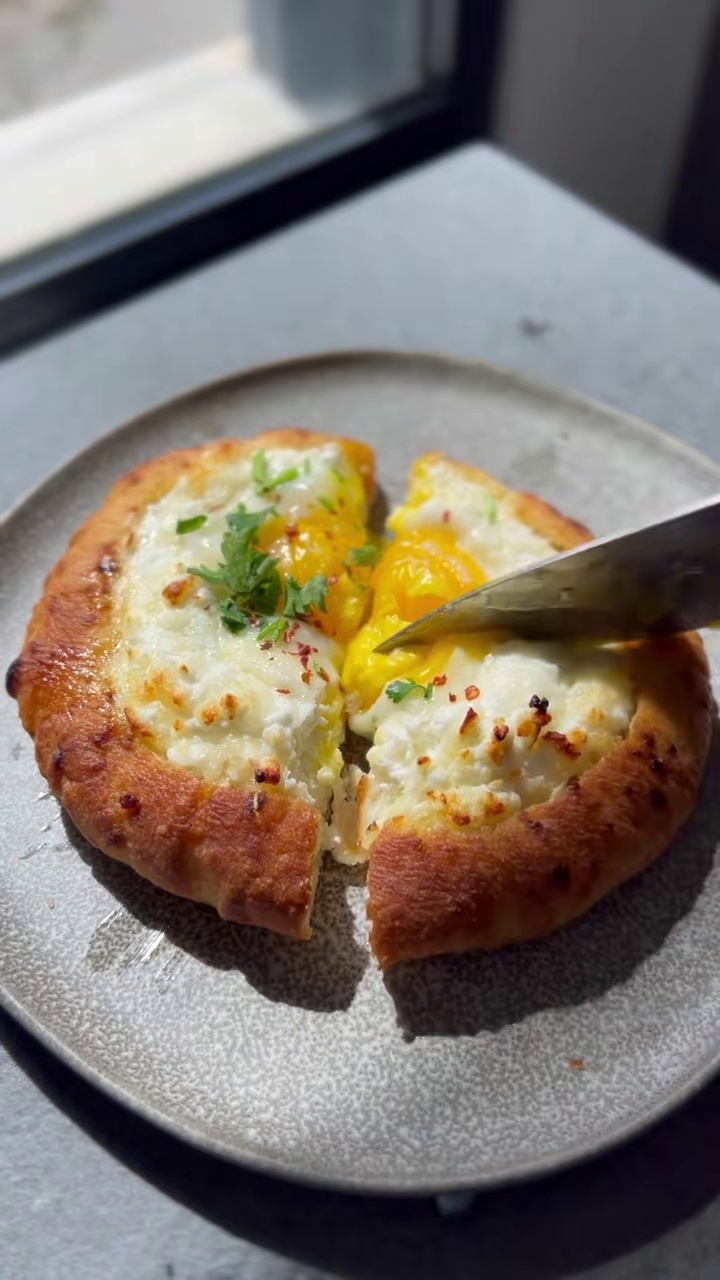 Preview1mPreviewRemove the Pita Khachapuri from the oven and serve immediately while hot.
💡 Tip: Click on any step to mark it as completed and track your cooking progress!