Back to International Recipes

Author:
shiranyy_
TikTok
4M
289K
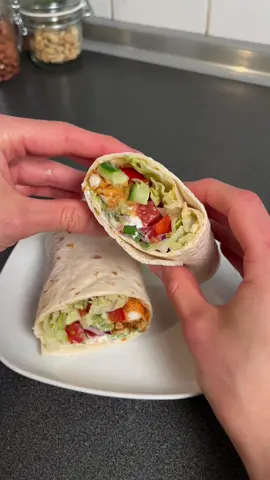
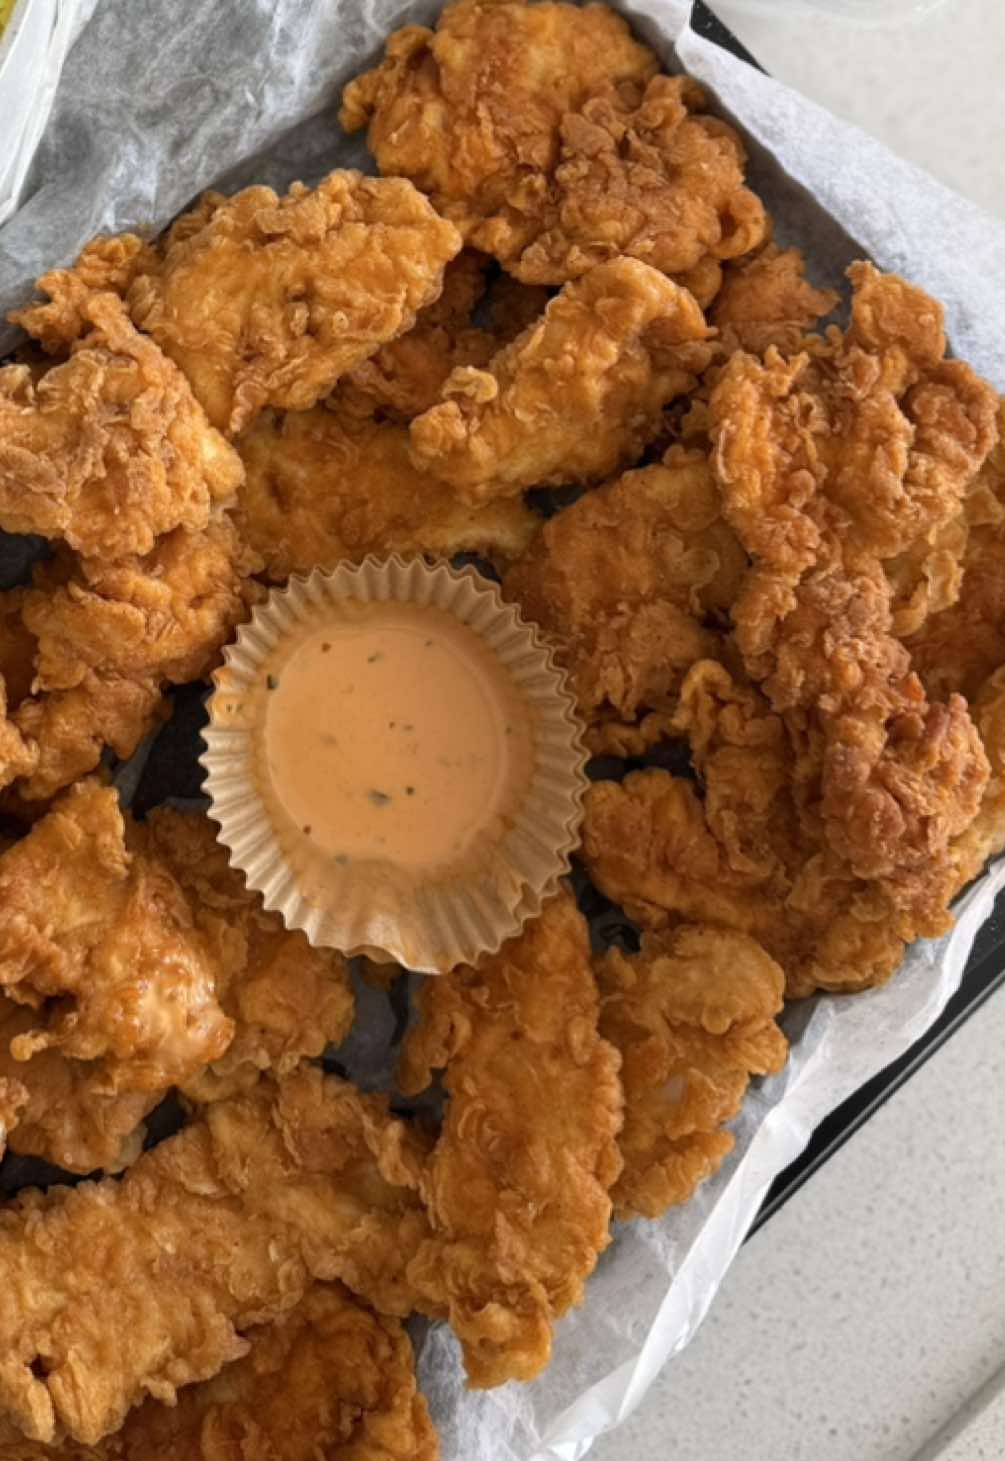
Perfect Crispy Chicken Strips
This recipe guides you through making delightful crispy chicken strips, starting with tender chicken breast cut into even pieces. Each strip is first coated in a flavorful wet tempura batter, then transferred to a seasoned dry flour mixture for an extra crispy texture. Finally, the chicken is deep-fried to a golden brown perfection, resulting in a crunchy exterior and a juicy, tender interior. This dish is ideal as a crowd-pleasing appetizer or a satisfying main course.
#Crispy Chicken
#Fried Chicken
#Chicken Breast
#Appetizer
#Main Course
#Quick Meal
#Deep Fried

Raw chicken breast strips ready for prep
Recipe Information
15m
Prep Time
10m
Cook Time
25m
Total Time
4
Servings
Easy
International
Hebrew
Nutrition (per serving)
505
Calories
34g
Protein
45g
Carbs
18g
Fat
Chicken strips coated in wet tempura batter
Ingredients
Servings: 4
💡 Tip: Check off ingredients as you add them to keep track of your progress!
Crispy chicken strips frying in hot oil
Instructions
0/7 completed
0%
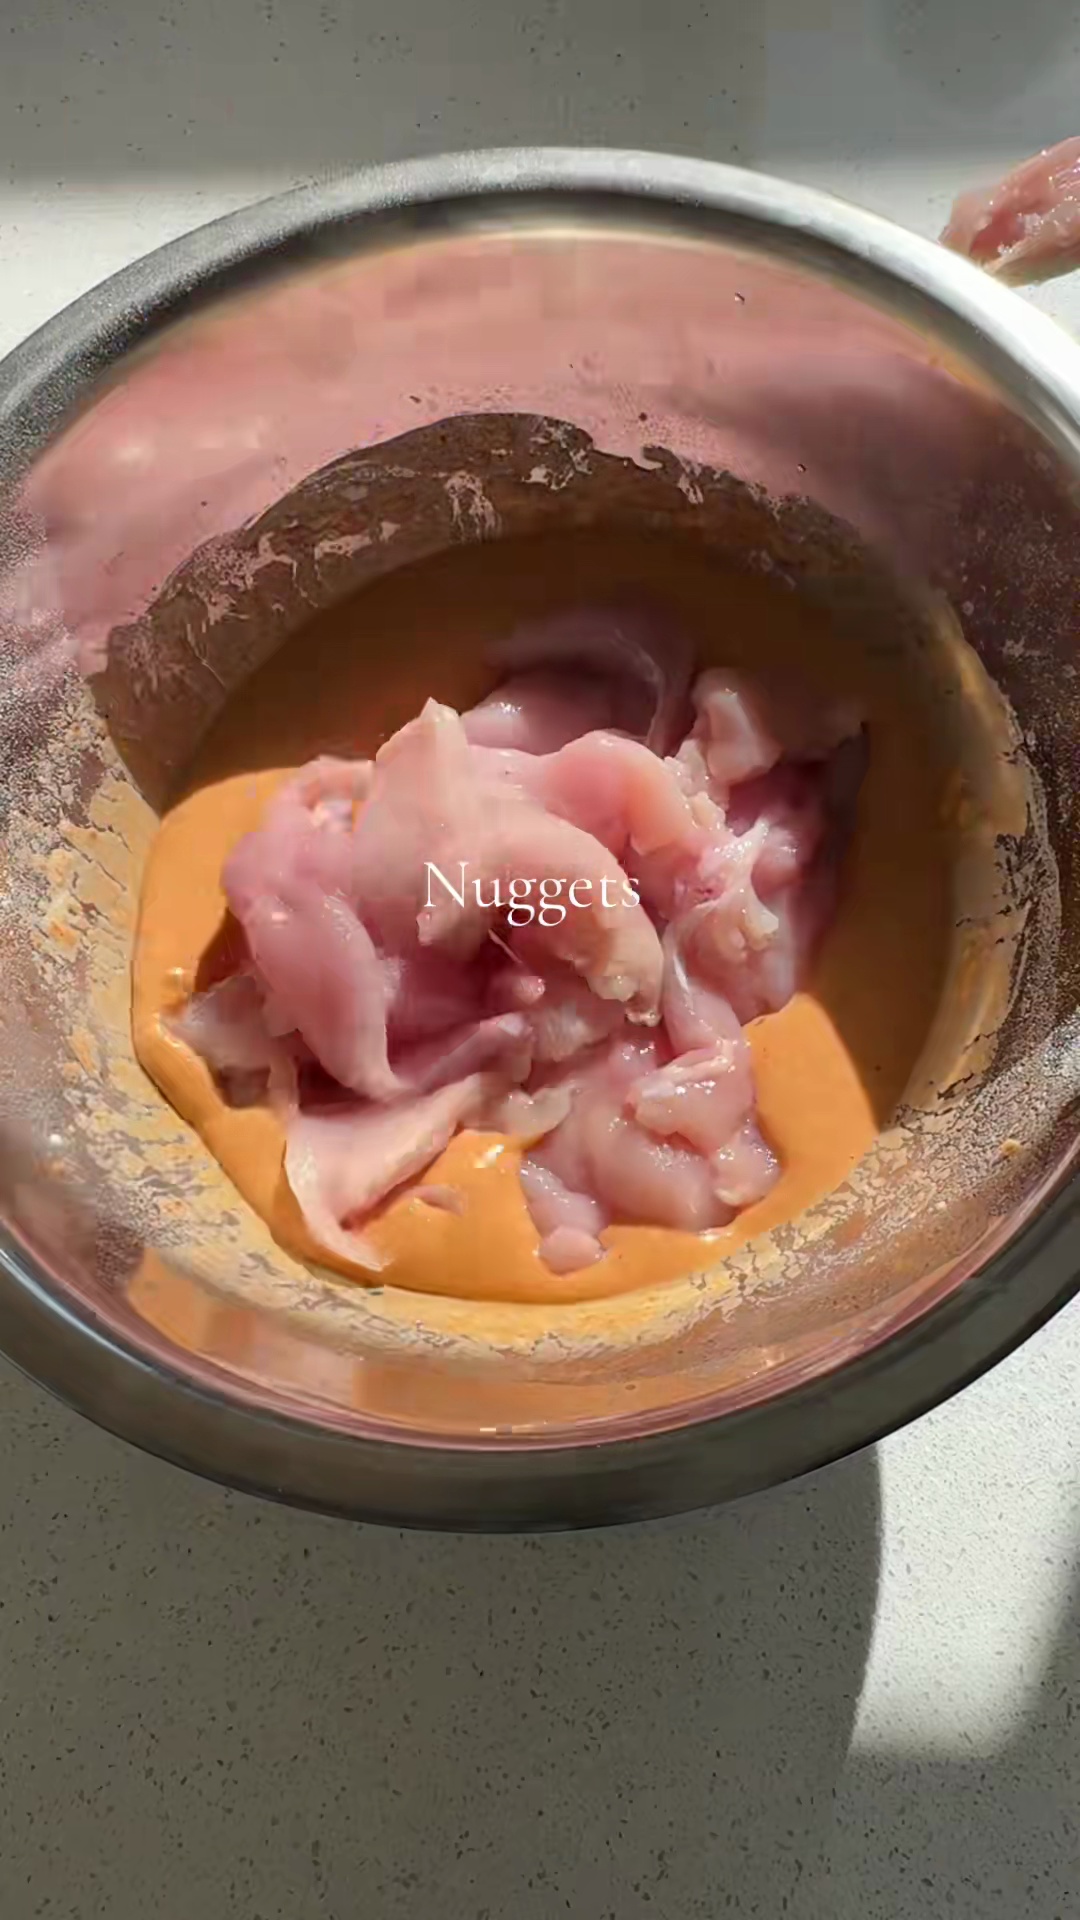
- Cut the 500 grams of chicken breast into uniform 1-inch wide strips, ensuring they are roughly the same size for even cooking.5mPreview5mPreviewCut the 500 grams of chicken breast into uniform 1-inch wide strips, ensuring they are roughly the same size for even cooking.
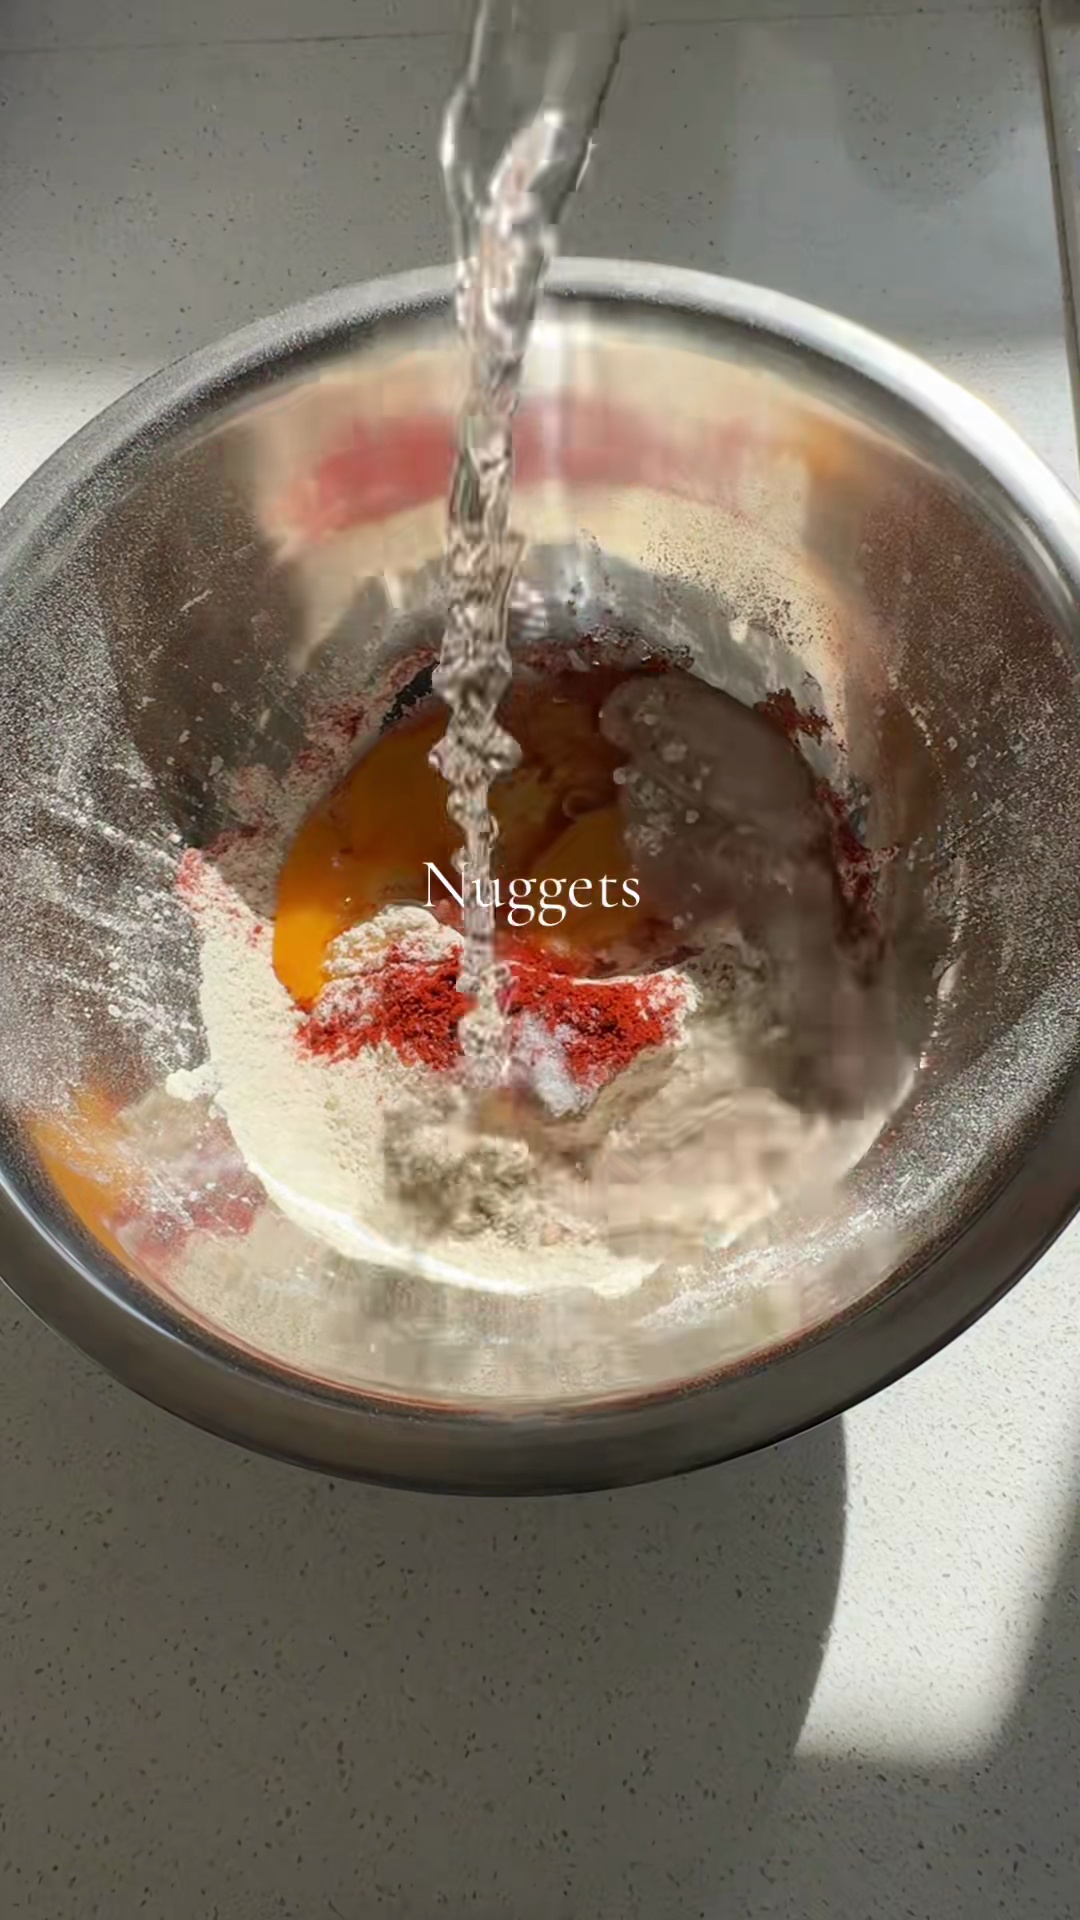
- Prepare the wet tempura batter by whisking together 1 cup of all-purpose flour, 1 teaspoon of sweet paprika, 0.5 teaspoon of salt, 0.5 teaspoon of black pepper, 2 large eggs, and 1 cup of water in a mixing bowl until the mixture is smooth and free of lumps.3m
 Preview3mPreviewPrepare the wet tempura batter by whisking together 1 cup of all-purpose flour, 1 teaspoon of sweet paprika, 0.5 teaspoon of salt, 0.5 teaspoon of black pepper, 2 large eggs, and 1 cup of water in a mixing bowl until the mixture is smooth and free of lumps.
 - Dip each chicken strip into the prepared tempura batter, making sure it is fully coated on all sides. Allow any excess batter to drip off briefly before proceeding.2mPreview2mPreviewDip each chicken strip into the prepared tempura batter, making sure it is fully coated on all sides. Allow any excess batter to drip off briefly before proceeding.
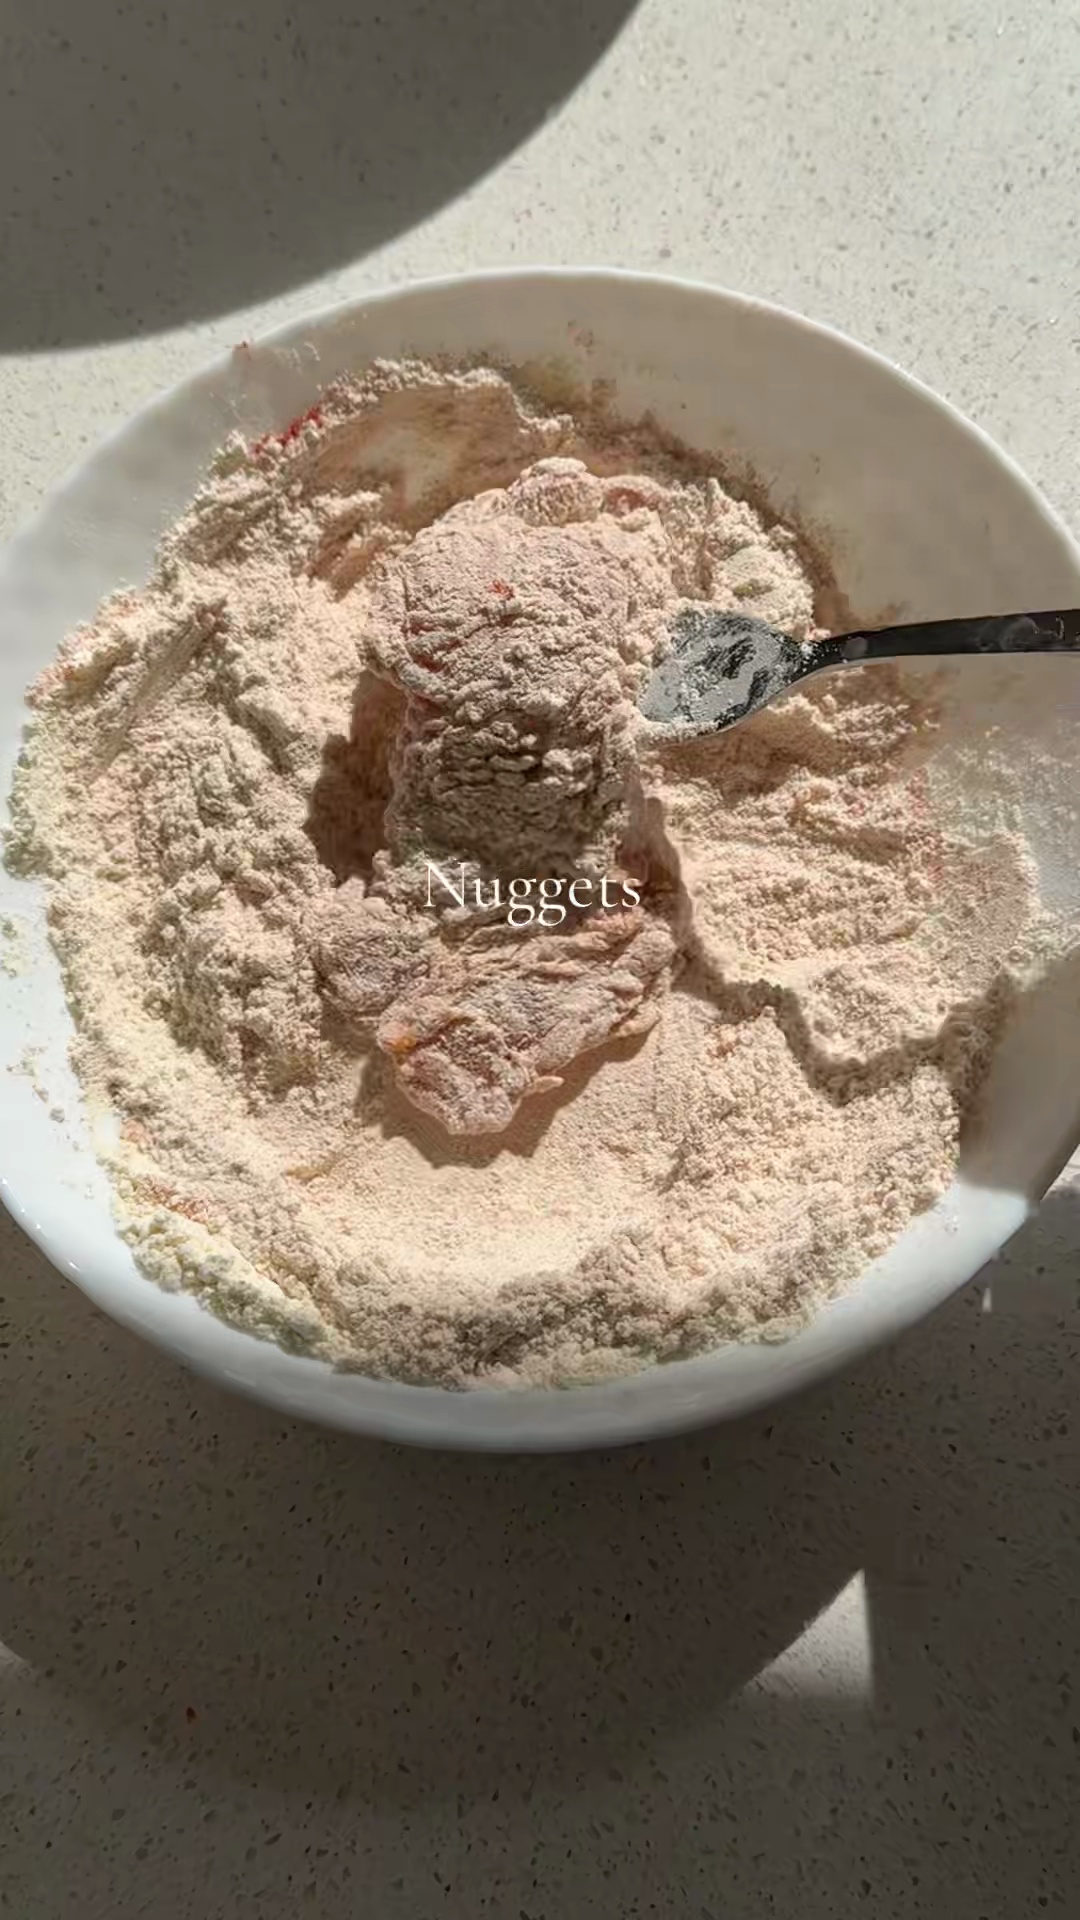
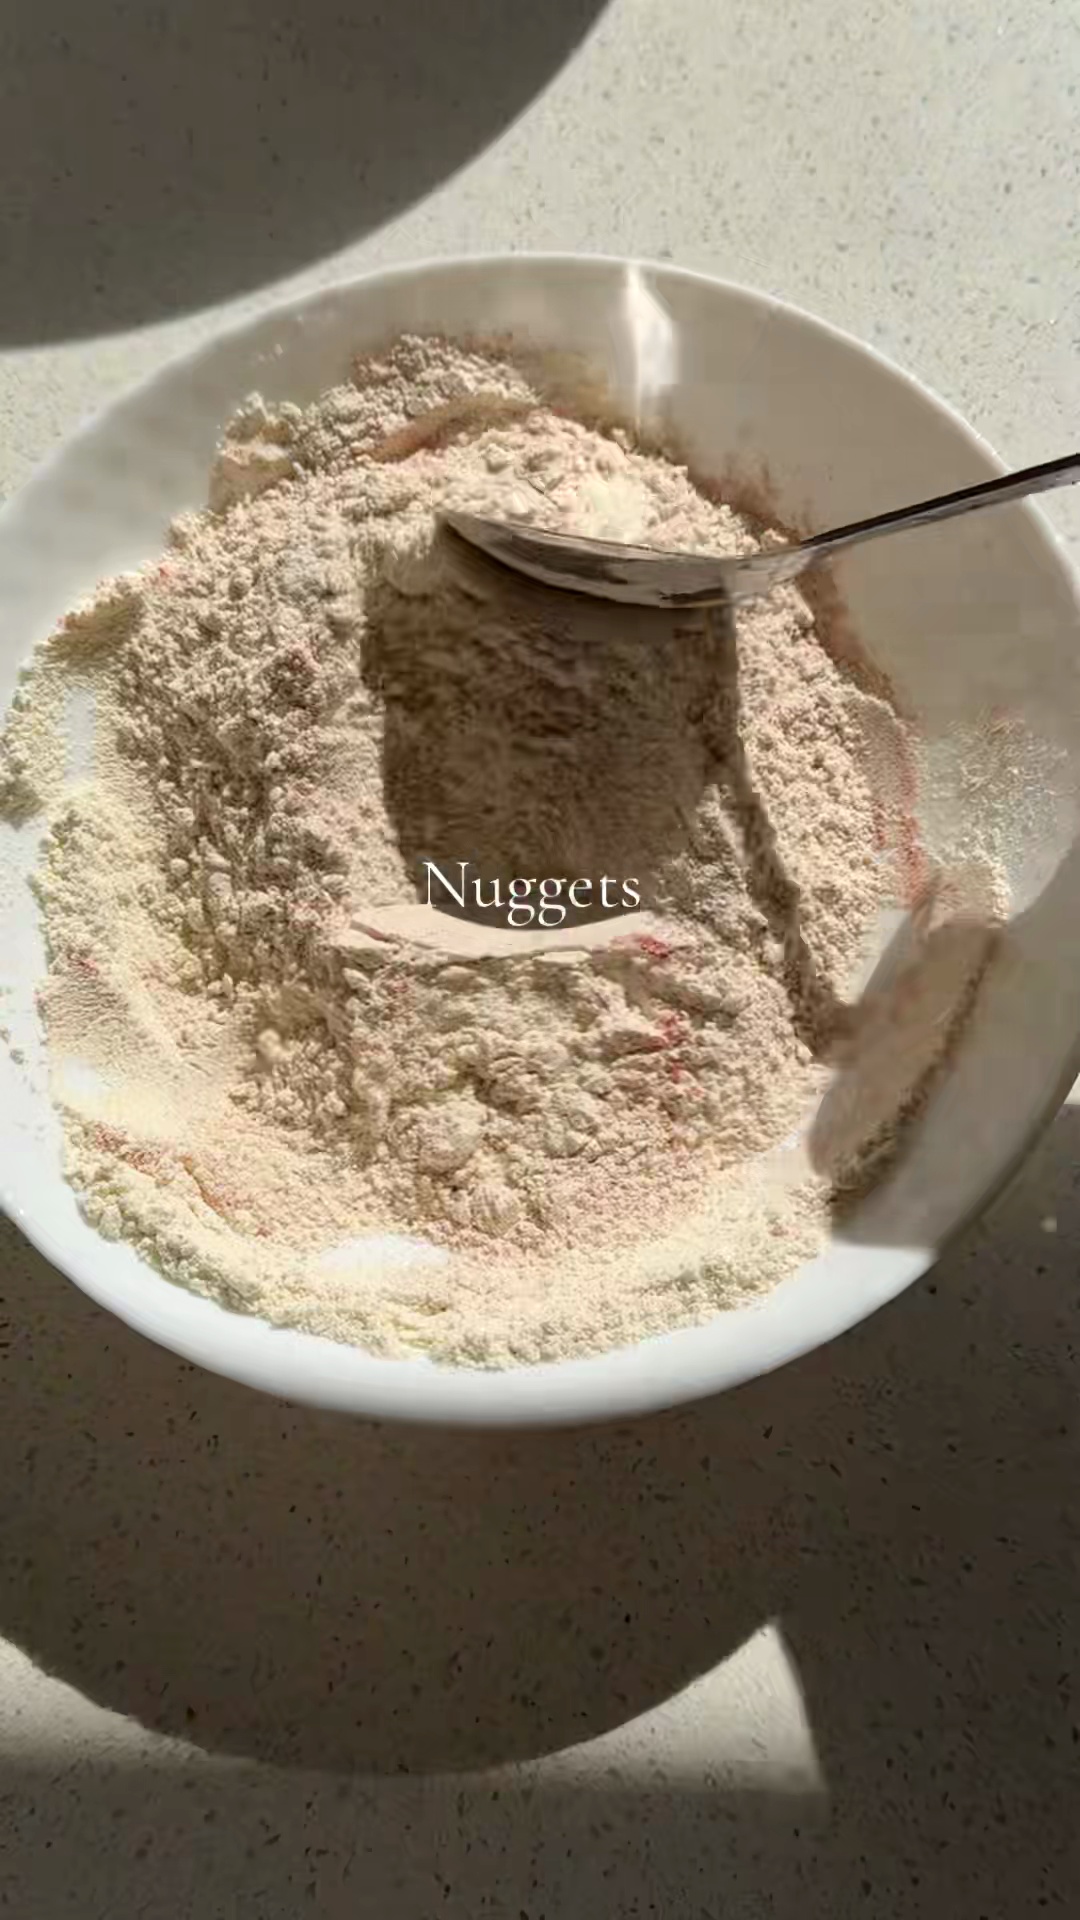
- In a separate, wide shallow bowl, prepare the dry coating by mixing 1 cup of all-purpose flour, 1 teaspoon of sweet paprika, and a desired amount of salt.2m
 Preview2mPreviewIn a separate, wide shallow bowl, prepare the dry coating by mixing 1 cup of all-purpose flour, 1 teaspoon of sweet paprika, and a desired amount of salt.
 - Transfer the batter-coated chicken strips to the dry coating mixture. Thoroughly coat each piece, pressing gently to ensure the dry mixture adheres well to the wet batter.3m
 Preview3mPreviewTransfer the batter-coated chicken strips to the dry coating mixture. Thoroughly coat each piece, pressing gently to ensure the dry mixture adheres well to the wet batter.
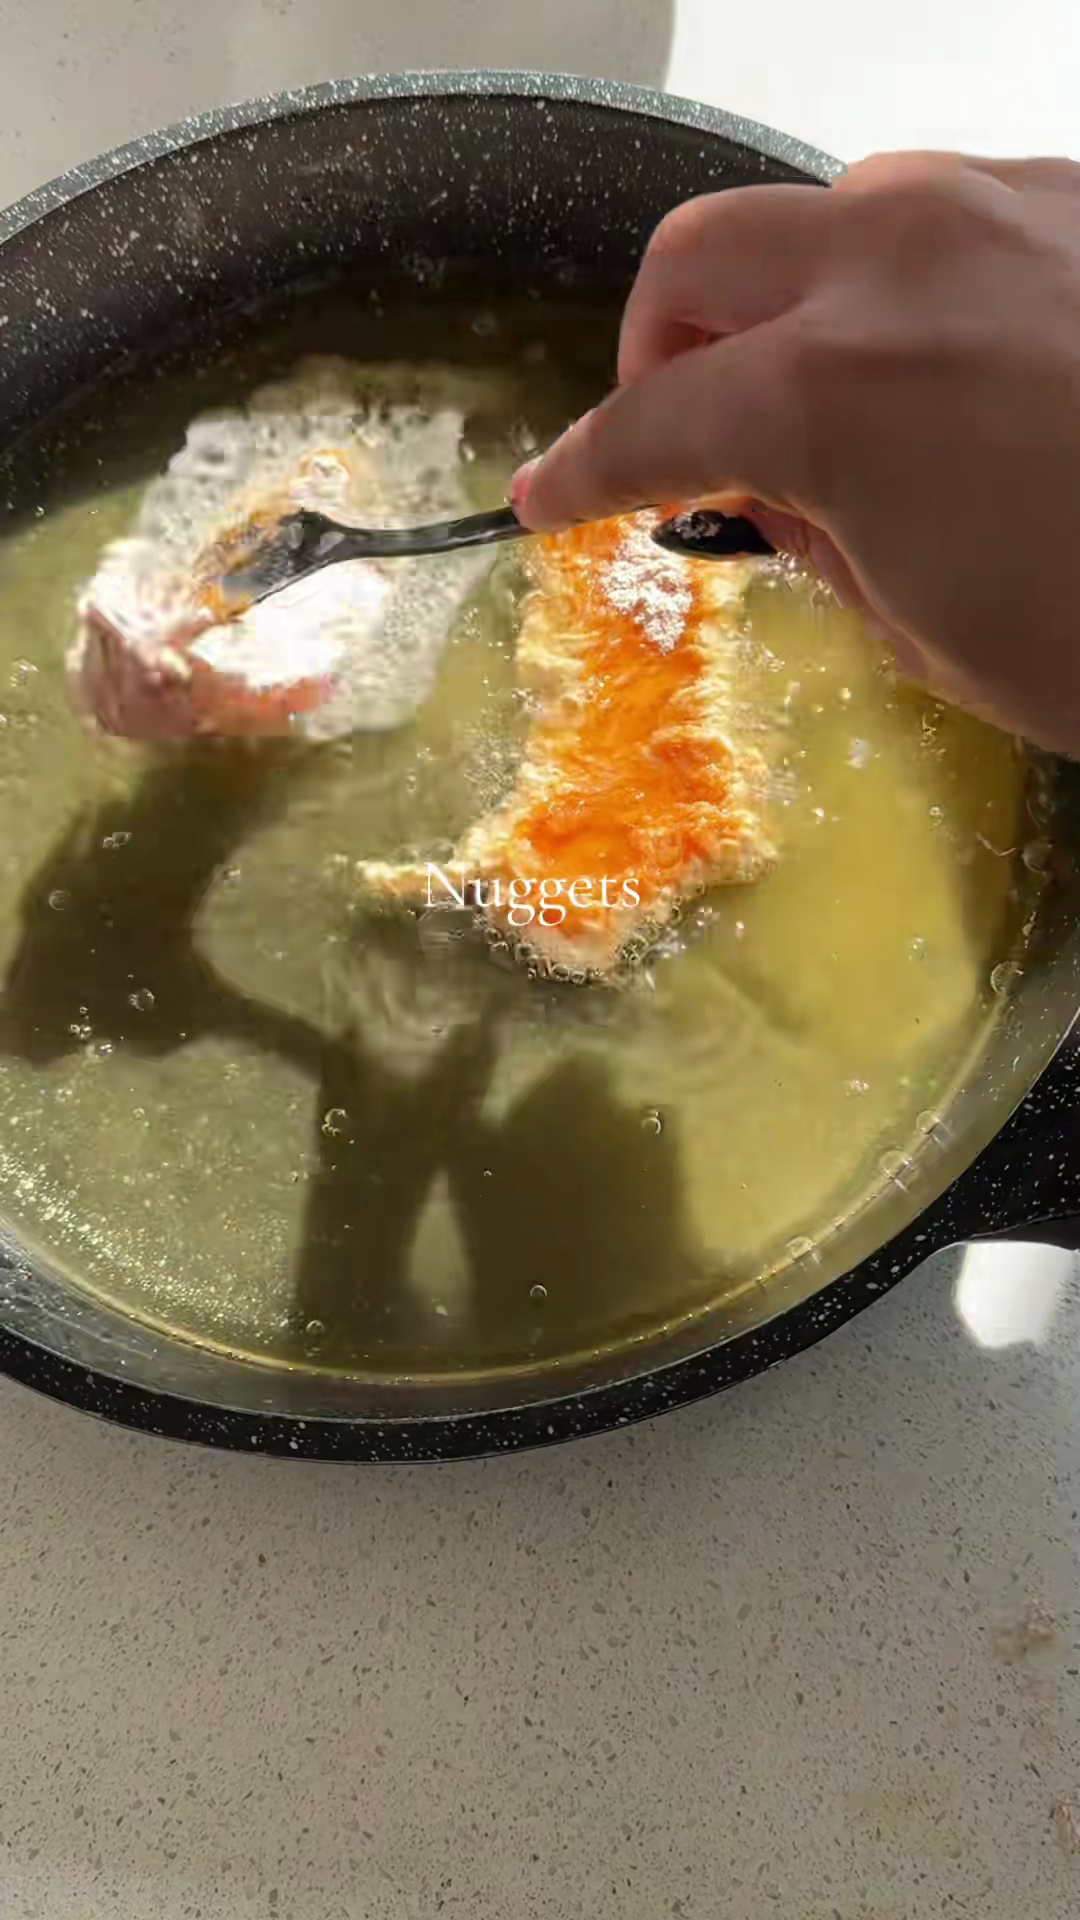
 - Heat an adequate amount of vegetable oil in a deep pan or pot to approximately 350-375°F (175-190°C). Carefully place the coated chicken strips into the hot oil.5mPreview5mPreviewHeat an adequate amount of vegetable oil in a deep pan or pot to approximately 350-375°F (175-190°C). Carefully place the coated chicken strips into the hot oil.
- Once cooked, remove the crispy chicken strips from the oil and place them on a wire rack lined with paper towels to drain any excess oil. Serve immediately while hot.2m
 Preview2mPreviewOnce cooked, remove the crispy chicken strips from the oil and place them on a wire rack lined with paper towels to drain any excess oil. Serve immediately while hot.
💡 Tip: Click on any step to mark it as completed and track your cooking progress!